


Transform your dessert creations with stunning drip cake decorating ideas that will elevate your baking skills and delight your audience. Whether you’re a seasoned baker or just starting out, mastering the art of creating a perfect drip effect on your cakes can revolutionize your dessert presentations. In this article, we’ll explore various techniques, methods, and tips to help you achieve those elusive drips and cascading effects that make your cakes stand out. From simple drip cake designs to more elaborate dripping cake decorations, we’ll cover everything you need to know to master the craft. Discover how to incorporate drip effects into your baking projects, and learn expert tips that will ensure your cakes look professionally made every time. Get ready to take your dessert game to the next level with these easy-to-follow guides and creative ideas!
Key Takeaways
- Perfect Drip Effect: Achieve a stunning drip effect by using ganache or frosting and positioning the cake upright on a flat surface.
- Floral and Sparkling Touches: Elevate your drip cake with fresh flowers and edible glitter for a glamorous and eye-catching finish.
- Proven Techniques: Utilize Wilton 1A piping tips and adjust frosting consistency for precise control and a professional look.
- Alternative Textures: Explore creative alternatives like fondant or stabilized whipped cream for unique and varied textures.
- Stable Base and Precision: Begin with a firm cake base and pipe thin, vertical lines of frosting for a polished appearance.
- Seamless Finish: Smooth ganache using a blowtorch for a sleek look and practice your technique on a dummy cake for refinement.
- Creative Designs: Experiment with diverse patterns and decorative elements to customize your drip cake’s aesthetic.
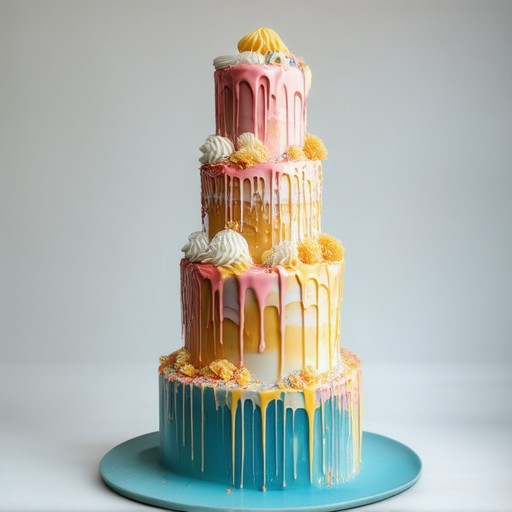
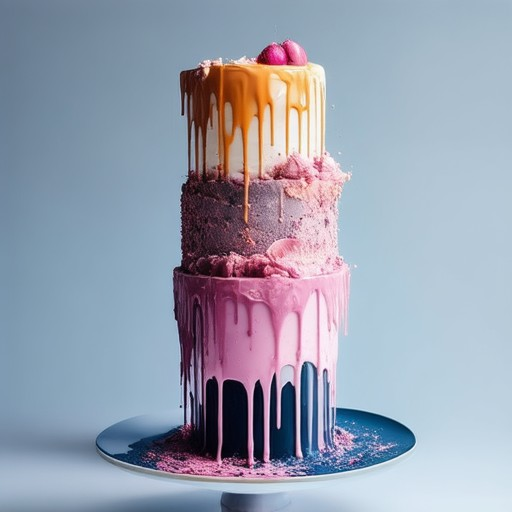
- Visual Impact: Showcase your drip cake’s beauty by displaying it on a contrasting plate or transparent stand, enhancing its visual appeal.
Creating a Stunning Dripping Cake Decoration
To achieve a stunning dripping cake decoration, follow these organized steps:
- Prepare Your Tools and Ingredients: – Use a quality palette knife for smooth application. – Opt for thick fondant or buttercream for better flow. – Prepare food-safe dye or gel colors for vibrant results. – Consider using corn syrup or milk to adjust icing consistency. – Ensure all decorations like candies and chocolates are ready ahead of time.
- Condition the Cake: – Ensure the cake is well-chilled to prevent melting. – Smooth the base with a light-colored icing for dramatic contrast. – Work in a cool room to maintain icing texture.
- Apply the Dripping Effect: – Start by spreading a thin layer of icing on the top and sides. – Use a steady hand to create a controlled pour, allowing the icing to flow naturally. – Practice on a dummy cake to master the technique before applying to the real cake.
- Add Decorative Elements: – Enhance the dripping effect with strategically placed candies or chocolates. – Sprinkle with edible glitter for a touch of elegance. – Consider using a stencil or roller for textured patterns on the base.
- Final Touches and Presentation: – Smooth the surface with a damp brush or sponge. – Arrange fresh flowers or greens for a refined look. – Present the cake on an attractive plate or stand.
By following these steps, you can create a visually captivating dripping cake decoration that impresses both visually and aesthetically. Remember to practice and experiment with different techniques to achieve your desired effect.
How to Achieve a Drip Effect on Your Cake Decorations
To create a drip effect on your cake decorations, follow these simple yet effective methods:
Method 1: Chocolate Drip Effect
- Melt high-quality chocolate or candy melts in a double boiler. Ensure the chocolate is slightly thinned with milk or butter for a smooth consistency.
- Use a fine-tipped piping bag or a decorator with a round tip (size 1 or 2) to apply the chocolate in a steady stream.
- Hold the tip at a slight angle above the cake to allow the chocolate to drizzle naturally. Move the tip in a zigzag motion for a professional look.
- Place the cake on a wire rack to encourage airflow and quick drying. Tilt the cake gently to ensure the drips fall evenly spaced.
- Add color variety by using different hues of chocolate. Allow each layer to dry completely before applying the next color. This creates a layered effect.
Method 2: Fondant Drip Effect
- Shape fondant into ropes or strips using a rolling pin or molds. Cut them into lengths suitable for your cake size.
- Wrap the fondant around a cake pop or small dowel to form a spiral or straight rope, then cut it to fit your cake.
- Place the prepared fondant pieces on the cake and twist or bend them to create a dripping effect. Use scissors to trim excess.
- Let the fondant set and dry according to the instructions on the packaging. This method typically dries faster than chocolate.
Method 3: Stencil-Guided Drip Effect
- Position cake stencils or cutouts on top of the cake. These can be made from paper or edible dough.
- Apply chocolate or fondant along the edges of the stencils or through the openings to create a guided drip effect.
- Allow the drips to set before removing the stencils. This ensures a clean and symmetrical design.
Additional Tips
- Practice on a trial cake or practice board to master your technique before decorating the actual cake.
- Keep the room temperature around 70°F (21°C) to prevent chocolate from seizing or fondant from drying too quickly.
- Store the decorated cake in a cool, dry place until ready to serve. Avoid placing it in direct sunlight to prevent melting or smudging.
By following these steps, you can easily achieve a professional-looking drip effect on your cake decorations. Experiment with different materials and designs to create a unique and visually appealing dessert!
How to Add a Drip Effect to Your Cake Decoration
To achieve a stunning drip effect on your cake, follow these easy steps:
- Melt the Chocolate: Start by melting your preferred chocolate type (dark or milk) in a double boiler or microwave. Ensure it’s slightly runny for easy pouring.
- Create a Mold or Guide: Use a small cookie cutter or shape to guide the drips. Place it centrally on your cake for uniformity.
- Add Color:** Mix a few drops of food gel dye into the melted chocolate for color. Test the mixture for consistency and flow before proceeding.
- Pour the Drips: Hold a pouring spout or toothpick steady above the cake. Pour in a continuous line, allowing gravity to create the drip effect. Space drips evenly for a balanced look.
- Enhance with Additional Streams: For added drama, create thicker streams by holding the spout closer. Experiment with alternating colors for visual interest.
- Let Set: Allow the drips to harden for a few minutes before adding decorations. This ensures they won’t smudge your final touches.
- Decorate Further: Top with sugar flowers, fondant shapes, or edible glitter. Fresh berries or mint leaves can add a refreshing touch.
Practice on a paper plate first to perfect your technique. Enjoy creating elegant cakes with a professional drip effect!
Creating a Beautiful Drip Cake Decoration
To craft a stunning drip cake, follow these organized steps for a perfect result:
- Base Preparation :
- Begin with a firm vanilla or chocolate cake base. Use a reliable cake mix designed for stability to support the dripping effect.
- Applying Ganache/Frosting :
- Pipe a thin line of ganache or frosting across the top using a vertical hold for precision. Start with a small tip for control.
- Dripping Effect :
- Allow the ganache to naturally drip down the sides. Position the cake upright on a flat surface to encourage free-flowing drips without pooling.
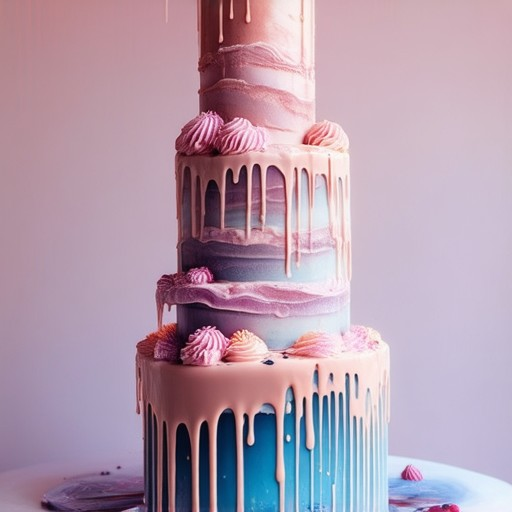
- Decorative Enhancements :
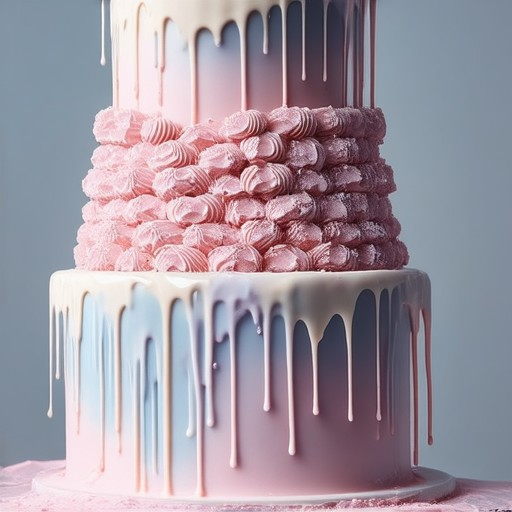
- Adorn with fresh flowers like roses or delicate petals for a floral touch. Sprinkle edible glitter for a sparkling finish, placing decorations around the edges or along drips.
- Smoothing Techniques :
- Use a blowtorch to smooth the ganache, ensuring a seamless look. Maintain controlled heat to prevent melting existing layers.
- Tools and Tips :
- Utilize Wilton 1A piping tips or slightly wider ones for the ganache line. Consider using spatulas or offset spatulas for even spreading.
- Timing and Testing :
- Apply decorations promptly after the initial layer sets but before hardening. Practice on a dummy cake to refine your technique and timing.
- Alternative Options :
- Explore using fondant for its pliability or stabilized whipped cream for a less sweet alternative, though be aware of reduced longevity.
- Presentation :
- Display the cake on a contrasting plate or transparent stand to highlight the dripping effect. Consider color coordination for visual appeal.
By methodically addressing each component and allowing time for the ganache to set, you’ll achieve a beautiful, polished drip cake that’s both visually striking and delicious.
How to Achieve a Drip Effect on Your Cake Decoration
To create a stunning drip effect on your cakes, follow these expert tips:
- Gather Essential Tools :
- Pastry bag with a fine round tip.
- Bench scraper.
- Sharp tool or cake decorator’s edge for scoring.
- Adjust Frosting Consistency :
- Use a medium-consistency frosting for better control.
- Adjust texture by adding more liquid or reducing sugar.
- Optimal Frosting Temperature :
- Keep frosting between 65°F (18°C) to 70°F (21°C) for smooth flow.
- Avoid refrigerating too long; let it warm slightly before piping.
- Pipe with Precision :
- Hold the pastry bag at a slight angle, 12 inches above the cake.
- Move steadily in straight lines, allowing the frosting to flow naturally.
- Enhance Edges with Scoring :
- Score the cake’s edges with a sharp tool for a clean look.
- This creates a defined base for your drip effect.
- Practice Patience and Technique :
- Work slowly to maintain control and avoid messes.
- Use the bench scraper to smooth excess frosting immediately.
- Experiment with Design :
- Try different patterns and placements for a unique look.
- Add decorative elements like flowers or sugar pearls for extra flair.
- Consider Cake Type :
- Use a lighter batter for better frosting adhesion.
- Explore stabilizers to prevent slipping and ensure durability.
By mastering these techniques, you can achieve a professional-looking drip effect that enhances your cake’s elegance.
How to Create a Stunning Drip Cake Decoration
To craft a visually captivating drip cake, follow these organized steps for a polished finish:
- Gather Essential Tools and Ingredients :
- A fine-edged knife for outlining.
- Melted chocolate (Wilton’s candy melts recommended).
- Hairdryer for controlled melting.
- Cake stencil or patterned edge cutter.
- Colored sugars or edible glitter for decoration.
- Outline the Cake Edge :
- Use the knife to trace a design or straight line around the cake edges.
- Fill the outlined area with melted chocolate for a sturdy base.
- Apply Vertical Lines :
- Create vertical lines of chocolate along the stencil or cutter marks for structural support.
- Create the Drip Effect :
- Position the hairdryer 6-8 inches away to melt chocolate smoothly.
- Apply heated chocolate along the edge in thin streams, allowing it to naturally drip down.
- Master Controlled Melting :
- Hold the hairdryer steadily to avoid splattering.
- Adjust temperature to prevent burning and ensure smooth flow.
- Practice and Refine :
- Test techniques on a dummy cake or small batches for mastery.
- Focus on controlled application for professional results.
- Enhance with Decorations :
- Allow chocolate to set before adding colored sugars or glitter.
- Consider a gradient effect using complementary colors like blue and gold.
- Final Touches :
- Use a cake turntable for symmetrical applications.
- Accentuate with fresh berries or flowers for a refined look.
By following these steps, you can achieve a stunning drip cake that’s both elegant and impressive. Embrace the process, practice, and let creativity shine!

0 Comments