


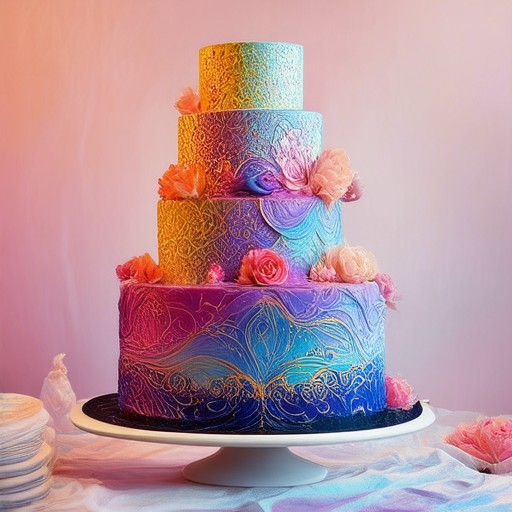
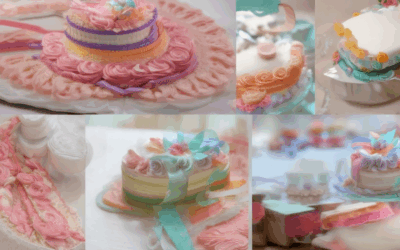
Transform your baked goods into works of art with the perfect airbrushing techniques for cakes. Whether you’re a seasoned baker or just starting out, discovering the secrets behind mastering airbrushing techniques for cakes can elevate your creations to new heights. From choosing the right tools to applying eye-catching effects, this comprehensive guide will walk you through everything you need to know to achieve professional-looking results. Learn how to use airbrushes effectively, experiment with colors, and create stunning designs that will impress anyone who sees your cakes. Ready to take your cake decorating game to the next level?
Mastering Cake Airbrushing: A Step-by-Step Guide
Introduction:
Airbrushing is an exciting technique that can transform your cakes into works of art. Whether you’re a novice or looking to enhance your skills, follow this guide to achieve stunning results.
Essential Tools:
1. Airbrush Tool: Opt for a gravity-fed system for ease of use.
2. Air Compressor: Required if using a siphon system.
3. Airbrush Tips: Wide tips for backgrounds, narrow tips for details.
4. Buttercream: Smooth and ready to use for best results.
5. Edible Dyes/Gel Colors: For adding color variations.
Preparation:
– Ensure your cake has a smooth frosting layer, using room temperature buttercream for easier application.
– Set up your airbrush according to the manufacturer’s instructions, focusing on the recommended angle and pressure settings.
Application Techniques:
1. Base Layer: Apply a thin layer of buttercream using a flat tool or fingers as a foundation.
2. Details: Use a 30-degree angle for the airbrush, starting with a practice board to refine your technique before decorating the actual cake.
Shading and Depth:
– Use lighter pressure for softer tones and darker pressure for deeper shades.
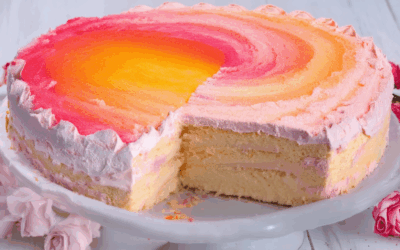
– Experiment with colors to achieve gradients, considering their opacity and how they blend.
Advanced Techniques:
– Layering: Begin with lighter shades and transition to darker ones for depth.
– Stippling: Create textures by using short bursts of air, mimicking fabrics or natural elements.
– Shading/Highlighting: Define shapes with darker shades and add depth with lighter tones.
Pattern Creation:
– Explore radial, linear, and fan patterns using different nozzle tips to add visual interest.
Post-Spray Care:
– Clean the airbrush after each use to prevent contamination.
– If clogged, tap gently to free blockages. Avoid over-spraying to prevent issues.
Finishing Touches:
– Enhance with luster dust or edible glitter for a shimmering effect.
– Seal the cake with a food-safe sealant to preserve both taste and appearance.
Practice and Patience:
Start with a dummy cake to practice, allowing you to experiment without risk. With proper setup, practice, and attention to detail, you’ll achieve beautiful, professional-looking cakes.
By following these steps, you’ll master the art of cake airbrushing, creating captivating designs that impress everyone.
How to Use an Airbrush for Cake
To effectively use an airbrush for cake decorating, follow these organized steps:
- Preparation: Begin by reading the manual that comes with your airbrush to understand its features and requirements. Ensure your airbrush is cleaned and ready to use.
- Holding the Gun: Hold the airbrush 6-8 inches away from the cake. Maintain steady control to ensure even coverage.
- Choosing the Right Tip: Select the appropriate tip size based on the area you’re working on. Larger tips are ideal for covering bigger surfaces, while smaller tips offer precision for details.
- Adjusting Pressure: Set the pressure appropriately. Too much pressure can lead to streaks, while too little may result in uneven coverage. Adjust according to the type of paint you’re using.
- Applying Base Colors: Start with a light, even stroke. Work in sections, moving your hand smoothly to cover the cake evenly. Apply multiple thin layers for better coverage.
- Creating Gradients: To achieve gradients, gradually change the angle and pressure of your strokes. Practice on a practice board before working on the cake.
- Using Stencils and Masks: Place stencils or cutouts on the cake. Lightly spray over them to transfer the design onto the cake. Use masks for areas you want to protect from color.
- Add Details and Edges: Once the base is dry, add details using the same technique. Spray along the edges for a seamless finish. Consider using a lighter touch for delicate designs.
- Cleaning the Airbrush: After use, clean the nozzle with isopropyl alcohol or a recommended solvent. Store the airbrush in a dry place when not in use.
- Maintenance Tips: Regularly clean the airbrush to prevent clogs. Disassemble it if necessary and store separately to prolong its life.
For more expert tips and resources on airbrushing, visit Tort Decor to explore tutorials and guides tailored for cake decorators.
Can I Use Regular Liquid Food Coloring in My Airbrush?
Using regular liquid food coloring in an airbrush is not recommended due to several potential issues:
- Nozzle Clogging: Regular food coloring contains oil-based ingredients that can cause the airbrush nozzle to clog, reducing its efficiency and potentially stopping the flow altogether.
- Spray Pattern Issues: The oil content in regular food coloring can interfere with the airbrush’s spray mechanism, leading to uneven or blobby patterns.
- Drying Problems: Airbrush colors need to dry quickly, and regular food coloring might not adhere properly, causing smudging or fading.
- Consistency Concerns: Regular colors are often too thick for effective airbrushing, requiring thinning, which can be challenging and may not yield the desired results.
- Limited Shade Options: Specialized airbrush colors come in specific hues popular for cake decorating, which may not be available in regular food coloring.
For optimal performance and results, it’s advisable to use airbrush-specific liquid food coloring. These products are formulated to work seamlessly with airbrush guns, ensuring smooth operation and vibrant, long-lasting colors. Always follow the manufacturer’s guidelines for thinning and application to achieve the best outcomes.
How to Airbrush a Cake with Luster Dust
To achieve a stunning and professional-looking cake with luster dust using an airbrush, follow these organized steps:
- Prepare the Luster Dust Mixture :
- Begin by gathering your luster dust and a bottle of vodka.
- Pour the luster dust into a small container.
- Add enough vodka to the luster dust to make it fluid, ensuring it doesn’t become too runny.
- Shake the mixture well to combine the ingredients thoroughly.
- Set Up Your Airbrush :
- Attach the airbrush to a compressor.
- Test the airbrush at various pressures to find the optimal setting for a fine mist application.
- Apply the Luster Dust :
- Hold the airbrush 15-20 inches above the cake to create a fine mist.
- Start at the top of the cake and move in a steady, controlled manner, working in sections.
- Use a back-and-forth motion to ensure even coverage without overloading any area.
- Create a Shimmer Effect :
- To add depth and dimension, vary the pressure and distance while spraying.
- Experiment with different angles and movements to achieve a dynamic, shimmering finish.
- Allow to Dry :
- Let the luster dust treatment dry completely on the cake, typically taking about 10-15 minutes, to prevent smudging.
- Consider Color and Theme :
- Select luster dust colors that complement your cake’s theme, whether elegant gold/silver for a formal look or pastel shades for a softer appearance.
- Use Tools Wisely :
- Utilize a palette to mix colors effectively and clean your airbrush after use to maintain its performance.
By meticulously following these steps, you can transform your cake into a masterpiece with a radiant luster effect, perfect for any occasion.
Can You Airbrush a Buttercream Cake?
Yes, you can airbrush a buttercream cake to create stunning decorative effects. With the right technique and tools, achieving beautiful designs becomes easier than you might think.
Tools You’ll Need
- An airbrush tool (gravity-fed or siphon system)
- Air compressor (if using a siphon system)
- Various airbrush tips (wide for backgrounds, narrow for details)
- Buttercream frosting (smooth and ready to use)
- Edible dyes or gel colors (optional)
How to Airbrush Your Cake
- Preparation: Start with a smoothly frosted cake. The buttercream should be at room temperature for easy application.
- Background: Begin by applying a thin layer of buttercream over the cake using a flat tool or your fingers. This creates a base for your design.
- Details: Hold the airbrush at a 30-degree angle and start working in steady motions. Practice on a practice board before attempting on the cake.
- Shading and Depth: Use lighter pressure for softer tones and darker pressure for deeper shades. Experiment with different colors to achieve a gradient effect.
- Fine Details: For intricate designs, switch to a fine-tipped airbrush and adjust the distance for better control.
Expert Tips
- Keep the airbrush nozzle 6-8 inches away from the cake to avoid overheating the frosting.
- Work in layers. Start with lighter colors and finish with darker ones for a seamless look.
- Practice on a dummy cake to master your technique before working on the actual dessert.
- Clean the airbrush frequently to prevent clogging and ensure smooth application.
Troubleshooting
- If the frosting starts to separate, stop and let it rest before continuing.
- Adjust the air pressure if you notice uneven coloring or streaks.
- Consider using a cooling fan to dry the frosting between layers if needed.
Conclusion
With patience and practice, airbrushing your buttercream cake can transform it into a work of art. Whether you’re creating a subtle design or an elaborate masterpiece, the possibilities are endless. Happy decorating!
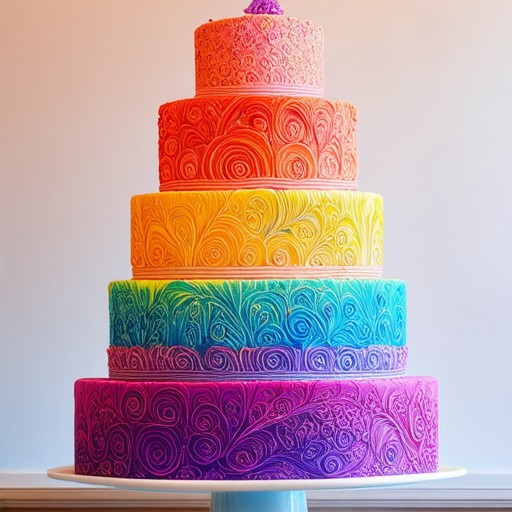
Best Airbrushing Techniques for Cakes
Airbrushing is a versatile and rewarding technique for decorating cakes, allowing for intricate designs and smooth finishes. Here are some expert-level tips and techniques to help you master airbrushing for cakes:
1. Tool Maintenance and Setup
- Maintain your airbrush regularly by cleaning it after each use and storing it in a dry place.
- Use only high-quality airbrush guns and accessories to ensure consistent performance and longevity.
- Set up your airbrush according to the manufacturer’s instructions to maximize efficiency and control.
2. Base Coat and Primer
- Start with a smooth base coat using a high-quality primer. This ensures better adhesion and a professional finish.
- Apply the base coat evenly, working in thin layers to avoid buildup and ensure full coverage.
- Allow the base coat to dry completely before moving on to detailed work.
3. Layering Techniques
- Layer colors gradually to create depth and dimension. Start with lighter shades and transition to darker ones.
- Use fine-tipped brushes or airbrush tips to apply detailed patterns and designs.
- For a soft-focus effect, blend colors by overlapping slightly with each pass.
4. Spray Patterns and Effects
- Experiment with spray patterns by adjusting your nozzle and distance from the cake.
- Use radial patterns for a floral or circular design, linear patterns for stripes or borders, and fan patterns for broader sweeps.
- Add texture with stippling or shading techniques by varying your pressure and movement.
5. Detail Work
- Build detailed elements like flowers, leaves, or geometric shapes by applying thin layers of color.
- Use reference guides or templates to ensure accuracy and symmetry.
- Practice blending colors by layering complementary hues to create vibrant and lifelike designs.
6. Fixing Common Mistakes
- If you notice runs or uneven coverage, blow gently with a hairdryer to smooth out the surface.
- Use a small brush dipped in acetone to lift and remove unwanted marks or smudges.
- Apply a light coat of varnish or sealer to protect your design and fill in gaps or cracks.
7. Finishing Touches
- Add final details with luster dust or edible glitter for a shimmering effect.
- Enhance dimensional elements with metallic powders or gels for added depth.
- Seal your cake with a food-safe sealant to preserve its freshness and beauty.
By mastering these techniques, you can create stunning and professional-looking cakes that will impress anyone who sees them. Experiment with different styles and tools to develop your own unique approach to airbrushing.
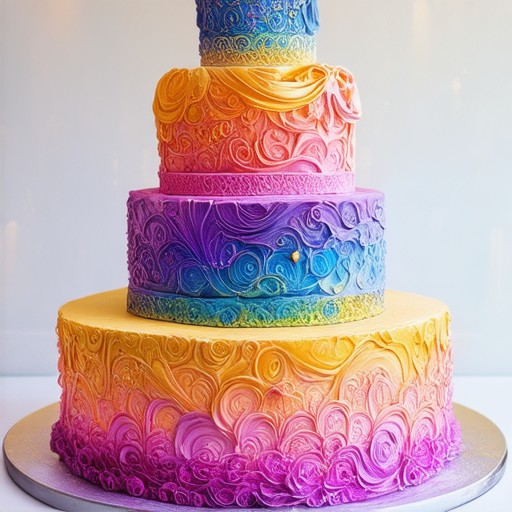
Best Airbrushing Techniques for Cakes
Airbrushing is a versatile and rewarding method for achieving stunning cake designs. Here are some expert-level techniques to help you master the craft:
- Tool Maintenance: Invest in a high-quality airbrush with replaceable tips and accessories. Regularly clean and maintain your tools to ensure optimal performance.
- Preparation: Start with a smooth, even base. Use a primer specifically designed for cakes to create a seamless surface for airbrushing.
- Layering Technique: Build your design in layers. Begin with lighter shades and gradually add darker tones. This method helps create depth and dimension.
- Color Blending: To achieve gradients, blend colors by spraying them in varying opacities. Experiment with different angles and pressures for a seamless transition.
- Stippling Effect: For detailed textures, use short bursts of air to create fine stipple patterns. This works well for mimicking fabrics or natural textures.
- Shading and Highlighting: Use darker shades to define shapes and create shadows. Highlighting with lighter tones can add dimension and make your design pop.
- Detail Work: Apply intricate details last. Use a steady hand and adjust your pressure for precision. Consider using a fine-tipped nozzle for small accents.
- Pattern Creation: Experiment with spray patterns using different nozzle tips. Radial, linear, and fan patterns can add visual interest to your design.
- Post-Spray Care: Wipe your airbrush clean after each color change to prevent contamination. Allow the cake to dry completely before applying subsequent layers.
- Troubleshooting: If your brush becomes clogged, gently tap it against a surface to free up any blockages. Avoid over-spraying, as this can lead to peeling or uneven finishes.
For more expert tips and inspiration, explore our cake decorating tutorials and discover how to elevate your airbrushing skills to the next level.
Conclusion
Mastering airbrushing takes practice and patience, but with these techniques, you’ll be able to create stunning cake designs that impress. Experiment with different colors and styles to find your unique signature look!
0 Comments