


Unlock the potential of cake molds and elevate your baking skills with our comprehensive guide to creating beautifully shaped cakes and decorations. Whether you’re a seasoned baker or new to the craft, cake molds offer a versatile toolset to transform simple ingredients into stunning desserts. From traditional cakes to trendy cake pops and elaborate fondant designs, these molds allow for endless creative possibilities. Discover how to choose the right type of mold, prepare it for baking, and achieve professional-quality finishes every time. This article dives into the ins and outs of working with cake molds, including tips on ingredient selection, baking techniques, and decoration methods. Get ready to unlock a whole new level of culinary creativity with the power of cake molds!
Key Takeaways
– Preparation: Dust cake molds with flour or vegetable oil to prevent sticking and preheat them for even batter distribution.
– Baking: Place molds on a parchment-lined tray, bake at around 350°F, and check for doneness with a toothpick every 20 minutes. Allow cakes to cool before removing to prevent breaking.
– Cooling: Let cakes cool on a wire rack for at least an hour and store in an airtight container for up to 3 days.
– Decorating: Use a thin layer of frosting or fondant for smooth coverage and press cake molds into frosted surfaces for decorative shapes.
– Storage: Keep cakes stored vertically or on a flat surface to prevent warping and use supports if necessary.
Effective Utilization of Cake Molds
To create beautifully shaped cakes and decorations, follow these organized steps:
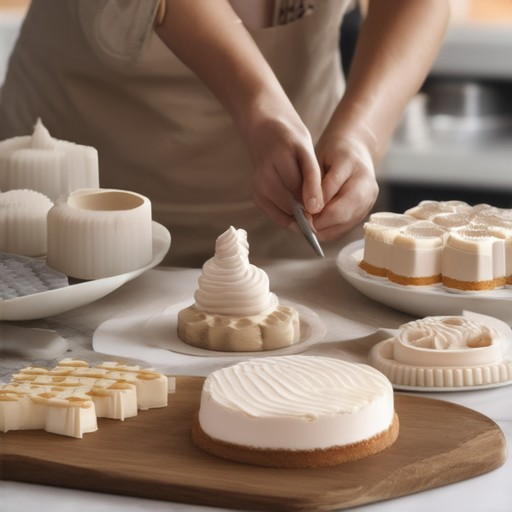
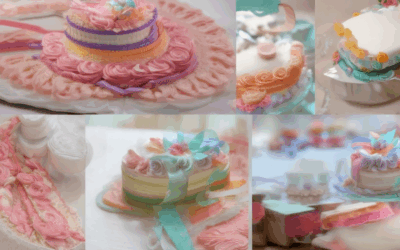
- Select the Right Mold: Choose a mold that aligns with the event or theme. Options include wedding-themed molds like flowers or hearts, and fun birthday molds such as dinosaurs or unicorns.
- Prepare the Mold: Grease the interior of the mold with a non-stick spray or brush with butter to prevent sticking. Ensure the mold is clean and free from moisture.
- Mix the Batter Properly: Use high-quality ingredients like flour, sugar, eggs, butter, milk, and vanilla extract. Ensure the batter is smooth and pourable. Avoid adding too much liquid or flour for the right consistency.
- Pour and Smooth: Pour the batter gently into the mold. Avoid splashing by tilting the mold slightly. Use a spatula to flatten the top and remove any air bubbles by tapping the mold lightly on the counter.
- Bake to Perfection: Bake according to the recipe instructions, using a timer to monitor the bake time. Cool the cake in the mold for a few minutes before inverting it to prevent breaking.
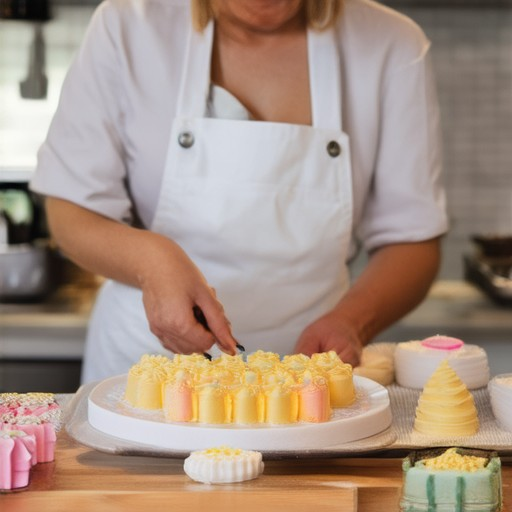
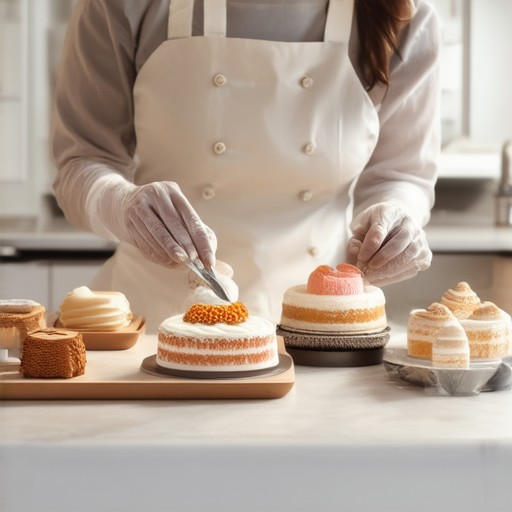
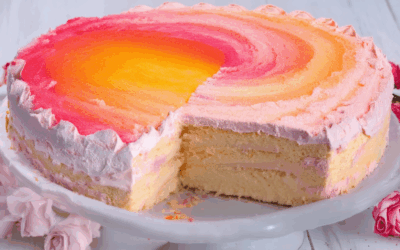
- Create Decorations: Repurpose the mold with a different color or flavor for decorative designs. Stack layers for added depth and interest. Enhance with edible decorations like fondant cutouts or piped icing.
- Store and Present: Keep the cake in an airtight container or wrap it tightly in plastic wrap. Consider pairing it with a matching cake stand or serving plate. Add finishing touches like greenery or flowers for a polished presentation.
By following these steps, you can achieve stunning, well-shaped cakes and decorations effortlessly. Remember to measure batter accurately to avoid overflow and ensure thorough greasing to prevent sticking. Enjoy crafting beautiful cakes with ease!
Effective Utilization of Cake Molds
To create beautifully shaped cakes and decorations, follow these organized steps:
- Preparation:
- Dust cake molds lightly with flour or spray with vegetable oil to prevent sticking.
- Heat the molds slightly to ensure even distribution of batter.
- Measure batter carefully to avoid overflow; consider using a small spatula for precise pouring.
- Baking:
- Place molds on a parchment-lined tray or cake pan.
- Bake at recommended temperatures (usually around 350°F/175°C) until fully cooked, checking with a toothpick every 20 minutes.
- Allow cakes to cool completely before removing from molds to prevent breaking.
- Cooling:
- Let cakes cool on a wire rack for at least 1 hour to set properly.
- Store in an airtight container or refrigerator to keep fresh for up to 3 days.
- Decorating:
- Apply a thin layer of frosting or fondant using a spatula for smooth coverage.
- Press cake molds gently into frosted surfaces to create decorative shapes and textures.
- Combine colors creatively or use edible dyes for vibrant effects.
- Storage Tips:
- Keep cakes stored vertically or on a flat surface to prevent warping.
- Use dowels or supports if necessary to maintain cake shape during storage.
By following these steps, you can achieve professional-looking cakes with ease. Remember, patience and attention to detail are key to perfect results!
Effective Utilization of Cake Molds
To create beautifully shaped cakes and decorations, follow these organized steps:
- Select the Right Mold: Choose a mold that aligns with the event or theme. Options include wedding-themed molds like flowers or hearts, and fun birthday molds such as dinosaurs or unicorns.
- Prepare the Mold: Grease the interior of the mold with a non-stick spray or brush with butter to prevent sticking. Ensure the mold is clean and free from moisture.
- Mix the Batter Properly: Use high-quality ingredients like flour, sugar, eggs, butter, milk, and vanilla extract. Ensure the batter is smooth and pourable. Avoid adding too much liquid or flour for the right consistency.
- Pour and Smooth: Pour the batter gently into the mold. Avoid splashing by tilting the mold slightly. Use a spatula to flatten the top and remove any air bubbles by tapping the mold lightly on the counter.
- Bake to Perfection: Bake according to the recipe instructions, using a timer to monitor the bake time. Cool the cake in the mold for a few minutes before inverting it to prevent breaking.
- Create Decorations: Repurpose the mold with a different color or flavor for decorative designs. Stack layers for added depth and interest. Enhance with edible decorations like fondant cutouts or piped icing.
- Store and Present: Keep the cake in an airtight container or wrap it tightly in plastic wrap. Consider pairing it with a matching cake stand or serving plate. Add finishing touches like greenery or flowers for a polished presentation.
By following these steps, you can achieve stunning, well-shaped cakes and decorations effortlessly. Remember to measure batter accurately to avoid overflow and ensure thorough greasing to prevent sticking. Enjoy crafting beautiful cakes with ease!
Effective Utilization of Cake Molds
To create beautifully shaped cakes and decorations, follow these organized steps:
- Preparation:
- Dust cake molds lightly with flour or spray with vegetable oil to prevent sticking.
- Heat the molds slightly to ensure even distribution of batter.
- Measure batter carefully to avoid overflow; consider using a small spatula for precise pouring.
- Baking:
- Place molds on a parchment-lined tray or cake pan.
- Bake at recommended temperatures (usually around 350°F/175°C) until fully cooked, checking with a toothpick every 20 minutes.
- Allow cakes to cool completely before removing from molds to prevent breaking.
- Cooling:
- Let cakes cool on a wire rack for at least 1 hour to set properly.
- Store in an airtight container or refrigerator to keep fresh for up to 3 days.
- Decorating:
- Apply a thin layer of frosting or fondant using a spatula for smooth coverage.
- Press cake molds gently into frosted surfaces to create decorative shapes and textures.
- Combine colors creatively or use edible dyes for vibrant effects.
- Storage Tips:
- Keep cakes stored vertically or on a flat surface to prevent warping.
- Use dowels or supports if necessary to maintain cake shape during storage.
By following these steps, you can achieve professional-looking cakes with ease. Remember, patience and attention to detail are key to perfect results!
Effective Utilization of Cake Molds
To create beautifully shaped cakes and decorations, follow these organized steps:
- Preparation:
- Dust cake molds lightly with flour or spray with vegetable oil to prevent sticking.
- Heat the molds slightly to ensure even distribution of batter.
- Measure batter carefully to avoid overflow; consider using a small spatula for precise pouring.
- Baking:
- Place molds on a parchment-lined tray or cake pan.
- Bake at recommended temperatures (usually around 350°F/175°C) until fully cooked, checking with a toothpick every 20 minutes.
- Allow cakes to cool completely before removing from molds to prevent breaking.
- Cooling:
- Let cakes cool on a wire rack for at least 1 hour to set properly.
- Store in an airtight container or refrigerator to keep fresh for up to 3 days.
- Decorating:
- Apply a thin layer of frosting or fondant using a spatula for smooth coverage.
- Press cake molds gently into frosted surfaces to create decorative shapes and textures.
- Combine colors creatively or use edible dyes for vibrant effects.
- Storage Tips:
- Keep cakes stored vertically or on a flat surface to prevent warping.
- Use dowels or supports if necessary to maintain cake shape during storage.
By following these steps, you can achieve professional-looking cakes with ease. Remember, patience and attention to detail are key to perfect results!
Effective Utilization of Cake Molds: A Step-by-Step Guide
To create beautifully shaped cakes and decorations using cake molds, follow these organized steps:
- Preparation:
- Prepare your cake batter according to the recipe, ensuring it’s the correct consistency for molding.
- Measure the batter accurately based on the mold’s size to avoid overflow. Use a scale for precision.
- Grease or spray the inside of the mold with a non-stick cooking spray to facilitate easy removal later.
- Baking:)
- Preheat your oven to the recommended temperature, typically around 350°F (175°C), depending on the mold’s material.
- Place the mold on a sturdy baking sheet or cake pan to prevent warping during baking.
- Bake for the specified time or until a toothpick inserted into the cake comes out clean, checking at 5-minute intervals to avoid overbaking.
- Cooling:)
- Allow the cake to cool in the mold for about 10-15 minutes before removing it to set its shape firmly.
- Gently twist or lift the sides of the mold to remove the cake. Avoid forcing it or twisting hard to prevent cracking.
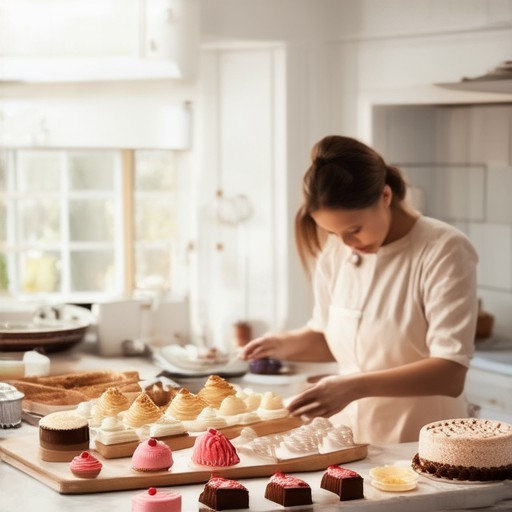
- Decoration:)
- Once cooled, place the cake on a cake stand or serving plate to decorate while slightly warm, as it will hold frosting better.
- Apply a thin layer of buttercream or fondant as the base for decorations.
- Use tools like pipers, spatulas, or brushes to add details, flowers, or edible decorations.
- For smooth transfers, use a cake dome or cover loosely with plastic wrap to keep the surface moist while decorating.
- Storage:)
- Store the decorated cake in an airtight container at room temperature for up to 3 days.
- For longer storage, keep in the refrigerator for up to 5 days, but note that it may become drier in texture.
Tools and Ingredients
Essential tools include:
- Mixer or whisk for incorporating air into the batter.
- Measuring cups and spoons for precise ingredient measurements.
- Silicone or metal cake molds in various shapes.
- Non-stick cooking spray or grease-proof paper.
Recommended ingredients: High-quality flour, eggs, sugar, butter, milk, vanilla extract, and coloring agents like food dye or gel.
Tips for Success
- Practice with simple shapes first before attempting complex designs.
- Use a toothpick to test for doneness instead of relying solely on the timer.
- Consider using a cake dome or tenting the cake with parchment paper while baking to prevent sagging.
Competitor Resources
For further learning and inspiration, explore these reputable platforms:
- Wilton – Offers comprehensive guides and video tutorials.
- Sugarcraft – Provides detailed tutorials and product reviews.
By following these steps and tips, you can master the art of creating stunning cakes using cake molds, elevating your baking projects to new heights.

0 Comments