


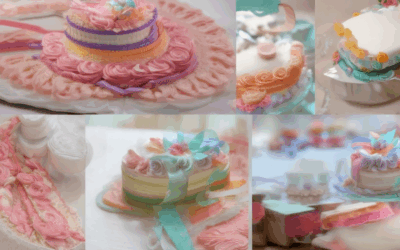
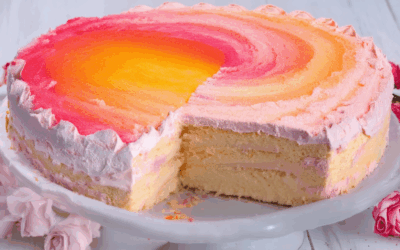
Creating a tiered cake is a delightful way to elevate your baking skills and impress your guests with a visually stunning and delicious dessert. Whether you’re preparing for a birthday party, wedding, or special occasion, a multi-layered cake adds elegance and sophistication to any event. In this comprehensive guide, we’ll walk you through everything you need to know to master the art of making a tiered cake, from understanding the basics to advanced techniques. Learn how to ensure your cake stays stable and intact, explore essential tools and ingredients, and discover creative ways to design and decorate your creation. With our step-by-step instructions and practical tips, you’ll be able to confidently craft a tiered cake that looks and tastes amazing every time. Let’s get started and unlock the secrets to making a perfect tiered cake!
Key Takeaways
– Master Essential Tools: Use a cake pan, turntable, and dowels to ensure proper layering and stability.
– Bake Layers Safely: Bake each layer individually and cool them properly to maintain structure and prevent shifting.
– Assemble with Precision: Layer cakes using buttercream as glue and frost for decoration and stability.
– Enhance Stability: Chill layers, insert dowels, and distribute weight evenly for a sturdy multi-tiered cake.
– Optimize Frosting: Apply frosting between tiers to strengthen the structure and ensure a smooth transition.
– Serve with Care: Handle the cake gently to avoid collapse and impress your guests with a perfectly assembled dessert.
– Add Flavor and Support: Incorporate fillings for extra taste and add supports for tall cakes if needed.

Do You Need Cake Boards Between Tiers?
Yes, cake boards are essential when stacking tiers for a multi-layered cake. Each tier should be placed on a cake board to prevent sticking and ensure stability. Here’s a breakdown:
- Purpose : Cake boards act as separators and stabilizers, preventing tiers from compressing or merging.
- Material : Common materials include cardboard or plastic, chosen for their durability and ability to support weight.
- Quantity : One cake board is typically used per tier, so for a three-tier cake, you’ll need two boards.
- Considerations : While alternatives like marzipan exist, they are less effective due to weight-bearing limitations. Sturdier options are recommended for dense or heavy cakes.
By using cake boards, you ensure your tiers remain well-supported and the cake remains intact, making it easier to handle and present professionally.
How to Make a 2-Tier Cake Sturdy
To ensure your two-tier cake remains sturdy and stable, follow these organized steps:
- Level Both Tiers : Begin by leveling each cake layer using a cake leveler or a sharp knife to remove any uneven parts. This ensures equal weight distribution.
- Determine the Heavier Layer : Identify which tier is heavier. Place the denser tier on the bottom by feeling the weight or noting thickness differences.
- Prepare the Dowel : Select a cake dowel slightly shorter than the cake’s height. Sharpen one end to facilitate easy insertion.
- Insert the Dowel Vertically : Hold the dowel vertically and insert it through both tiers, stopping when it touches both. Avoid excessive force to prevent damage.
- Secure with a Hammer : Gently tap the dowel around the edges with a hammer to secure it without causing harm to the cake.
- Seal the Hole with Buttercream : Cover the dowel hole with a thin layer of buttercream to fill gaps and reinforce stability.
- Use a Tall Cake Stand : Opt for a tall cake stand to support the entire structure. If unavailable, use smaller plates inside to distribute weight evenly.
- Cool Completely : Allow both tiers to cool completely on wire racks before stacking to prevent sagging due to residual heat.
By following these steps, you’ll create a sturdy two-tier cake that withstands both visual and structural scrutiny.

How to Put Tiers of a Cake Together
To assemble tiers of a cake, follow these organized steps for a stable and elegant result:
- Prepare the Bottom Tier :
- Allow the bottom tier to cool completely after baking and cooling on a wire rack.
- Insert plastic or wooden dowels into the bottom tier. Position them evenly spaced, typically reaching about halfway up the tier’s height.
- Place the Cake Board :
- Cut a circular cake board or cardboard circle slightly larger than the top tier’s size to fit around the dowels.
- Center the cake board over the dowels and gently press down to ensure it sits flush.
- Stack the Second Tier :
- Carefully place the second tier on top of the cake board, aligning it centrally.
- Check for stability by gently pressing down on the top tier; the structure should feel solid.
- Consider Additional Tiers :
- For each subsequent tier, repeat the process: insert dowels into the current top tier, place a cake board, and stack the next tier.
- Ensure each tier is level to maintain overall balance.
- Alternative Support Methods :
- Explore using cake wires or a sturdy cake stand with a wide base for added support and display convenience.
- Final Adjustments :
- Before decorating, allow the stacked tiers to rest for stability.
- Consider the cake’s density; lighter batters may require more careful handling.
By methodically preparing each tier and using supportive elements like dowels and cake boards, you can successfully stack and stabilize multi-tiered cakes, ensuring a professional-looking result.

How to Layer Cake for Beginners
To layer a cake effectively, follow these simple steps:
- Prepare Your Tools: Ensure you have two cake pans and a turntable or cake stand.
- Bake Layers Individually: Preheat your oven to 350°F (175°C). Grease and flour two standard cake pans . Bake one layer at a time until golden brown, typically 25-30 minutes.
- Cool Layers Before Layering: Allow each baked layer to cool completely on a wire rack before moving them to a cake board or serving plate.
- Assemble the Cake: Place the first layer on your cake board or serving plate. Spread a thin layer of buttercream as glue. Carefully place the second layer on top, aligning the edges. Continue this process for all layers, ensuring each is evenly spaced.
- Frost the Entire Cake: Once all layers are stacked, spread a smooth layer of frosting over the top and sides of the cake. Add decorative details using frosting tips .
- Let It Set: Refrigerate the cake for at least 30 minutes before serving to set the frosting and prevent sliding.
Tips for Perfect Layering:
- Use room temperature ingredients for smoother mixing and spreading.
- Press layers gently to ensure even thickness and prevent gaps.
- Consider adding fillings between layers for extra flavor, like caramel or lemon curd .
How to Ensure Cake Tiers Stay Stable and Intact
To maintain the stability and integrity of a multi-tiered cake during assembly and serving, follow these essential steps:
- Chilling Each Layer: Before assembling, chill each individual layer in the refrigerator for at least 30 minutes. This hardens the buttercream and strengthens the structure, making it easier to stack without shifting.
- Using Sturdy Dowels: Insert wooden dowels or cardboard cutouts into the center of each tier. These should be tall enough to support the weight of the upper tiers. For added security, align them vertically through all layers to distribute the weight evenly.
- Even Spacing: When stacking, ensure each tier sits evenly on top of the one below. Misalignment can cause instability. Use a turntable or mark guides to center each tier perfectly.
- Strengthening with Crusts: Apply a thin layer of frosting between tiers, not just on the tops. This creates a bridge that helps hold the tiers together and prevents sliding.
- Testing Stability: Before fully assembling, test the structure by gently shaking the cake slightly. If a tier moves, adjust the spacing or reinforce with additional dowels.
- Serving with Care: When cutting, use a sharp knife and steady hand to prevent the cake from collapsing. Serve slices slowly to maintain its structural integrity.
For more expert tips and detailed guides on cake decorating and assembly, visit our cake decorating tutorials section on Tort Decor.

How to Ensure Cake Tiers Stay Stable During Assembly and Serving
To maintain the stability and integrity of a tiered cake during assembly and serving, follow these essential steps:
- Use Sturdy Dowels : Insert wooden dowels through the centers of each cake tier. Ensure the dowels are tall enough to support the weight of the upper tiers. This helps distribute the weight evenly and prevents the cake from wobbling.
- Chill Layers : Before assembling, chill each individual cake layer in the refrigerator. This hardens the buttercream and makes the layers more rigid, reducing the likelihood of shifting during assembly.
- Trim Excess Icing : Remove any excess icing between the tiers. Too much icing can weigh down the upper tiers, causing instability. Trim neatly to ensure a smooth transition between layers.
- Balance Weight Distribution : Place heavier tiers on the bottom to balance the cake. This ensures the cake rests evenly on the plate or stand, preventing any movement or imbalance.
- Use Supports if Necessary : For extremely tall cakes or those with delicate decorations, consider adding additional supports or braces to stabilize the structure.
By following these tips, you can ensure your tiered cake remains stable and intact during assembly and serving, impressing your guests with a perfectly assembled dessert.

0 Comments