


Exploring the art of ombre cake decorating has become a beloved pastime for many home bakers and professional chefs alike, as it offers a unique way to transform simple cakes into visually stunning works of art. The ombre technique, which involves creating a gradient effect through gradual color transitions, adds depth and elegance to any baked good. Whether you’re a seasoned baker or just starting out, mastering ombre cake decorating techniques can elevate your creations to new heights. In this comprehensive guide, we’ll delve into the essential tips, techniques, and tricks needed to achieve a seamless gradient effect, ensuring your ombre cakes look professional and wow your audience every time. From selecting the right tools and ingredients to learning step-by-step methods for creating smooth transitions, this article will provide you with all the information you need to master the art of ombre cake decorating.
Key Takeaways
- Master the Gradient Layering Technique for a smooth transition effect.
- Use Wilton Icing for precise color application and seamless gradients.
- Spin and Blend Colors to create vibrant, natural gradients.
- Understand Color Theory to pair complementary colors effectively.
- Enhance Textures with Edible Glitters for a dynamic finish.
- Adopt Professional Tips to ensure a polished result.
Ombre Cake Decorating Tips
Creating an ombre cake can be a stunning addition to any dessert table. Here are some expert tips to help you master the technique:
- Choose the Right Tools: Invest in high-quality cake pans, spatulas, and icing smoothers. These tools will ensure your ombre effect looks smooth and professional.
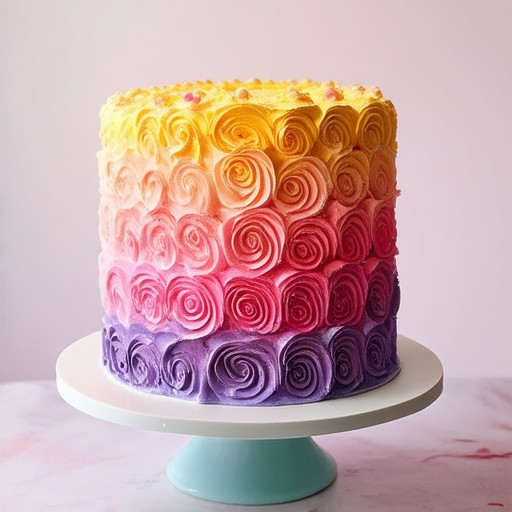
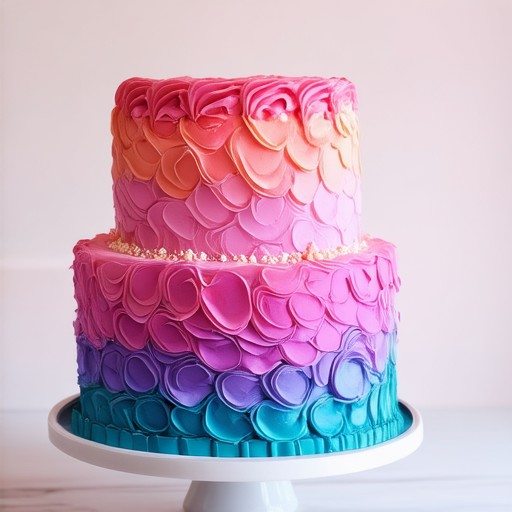
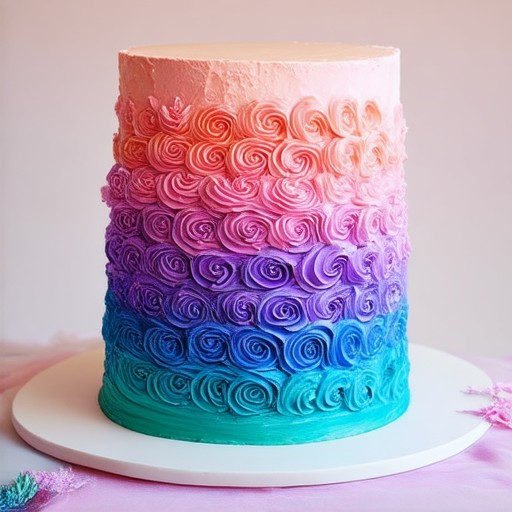
- Layer Colors Gradually: Start with your lightest color at the bottom and gradually darken the shades as you move upward. This creates the seamless transition that defines an ombre effect.
- Use Stencils for Precision: Apply stencils or templates to control where your colors blend. This helps in achieving a clean and polished look.
- Add Details with Edible Paint: Enhance your ombre design by adding decorative elements like flowers, pearls, or edible paint. These details can elevate your cake to a new level.
- Work with Fondant: If you’re using fondant, apply it thinly and smooth it evenly before adding your ombre layers. This ensures your final product is both elegant and sturdy.
- Consider Seasonal Colors: Tailor your ombre palette to match the season or occasion. Pastel tones work well for spring and summer, while rich, deep hues are perfect for winter weddings or holidays.
- Patient and Precise: Ombre requires attention to detail. Take your time blending the colors and ensure each layer is perfectly aligned. Rushing can lead to uneven results.
With these tips, you’ll be able to create ombre cakes that are as visually striking as they are delicious. Remember, the key to success is patience and a steady hand!
Best Ombre Cake Decorating Techniques
To achieve a stunning gradient effect on your cakes, follow these expert-level techniques:
- Preparation is Key : Begin with a perfectly baked and cooled vanilla cake. Ensure the surface is smooth and free of crumbs for a professional finish.
- Color Selection : Use high-quality gel food coloring for vibrant, long-lasting colors. Opt for edible dyes over liquid food coloring for better control and fade resistance.
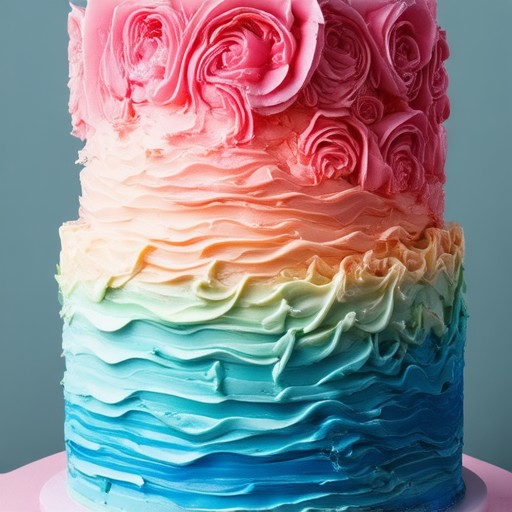
- Layering Technique : Start with the lightest shade and gradually introduce darker hues. Apply each color sparingly, focusing on edges and peaks for a seamless transition.
- Blending Secrets : Use a palette knife to blend colors smoothly. Work in thin layers and allow each shade to set before adding the next. Practice on a test board to master your technique.
- Color Complementation : Pair complementary colors for eye-catching gradients. Consider the cake’s base color when selecting your palette to ensure the ombre effect stands out.
- Add Texture : Enhance the gradient with fine dustings of edible powder or spritzes of shimmer spray for a polished look.
- Flavor Enhancement : Incorporate subtle flavors like vanilla or cocoa into your gradient layers for added depth and interest.
- Storage Tips : Keep the cake refrigerated to prevent fading and bleeding. Cover loosely with plastic wrap to maintain moisture without smudging the colors.
By combining these techniques with patience and precision, you’ll create a gradient masterpiece that wows everyone. For more pro tips and inspiration, explore our cake decorating tutorials and recipe ideas .
How to Create an Ombre Cake
To craft a stunning ombre cake, follow these organized steps for a gradient effect:
- Understand the Concept : Achieve a gradient transition from light to dark shades using gel food coloring.
- Tools and Ingredients :
- Two 9-inch round cake pans
- Gel food coloring in various shades
- Standard baking ingredients: flour, sugar, eggs, butter, milk, vanilla extract, and salt
- Coloring Technique :
- Begin with the lightest shade; mix a small amount of gel coloring into the batter
- Pour into the prepared pans, allowing each layer to settle before adding the next color
- Use a spacer under the second layer to ensure even distribution
- Baking Process :
- Bake each layer separately at 350°F (175°C)
- Adjust baking times for darker shades to prevent overcooking
- Cool layers on a wire rack before stacking
- Frosting and Decoration :
- Whisk cream cheese and butter for a stable frosting
- Pipe frosting between layers and around the edges
- Add edible glitter or sprinkles for a festive touch
- Assembly :
- Stack from darkest to lightest layer
- Level each layer for an even appearance
- Presentation Tips :
- Place on a decorative plate or stand
- Enhance with fresh berries or mint
Consider these tips for success: – Avoid overmixing batter to prevent air pockets. – Check with a toothpick before removing from pans. – Experiment with color combinations or add white chocolate ganache for richness.
Create a gradient dessert that captivates with its beauty and taste!
Best Ombre Cake Decorating Techniques
To achieve a stunning gradient effect in your cakes, try these expert-level techniques:
- Gradient Layering Technique
- Start by applying a base color to your cake using a brush or spatula.
- Add thin layers of progressively lighter or darker shades of the same color using a fine-tipped brush or piping bag.
- Let each layer dry completely before applying the next one for a smooth transition effect.
- Wilton icing is ideal for creating sharp edges and seamless transitions between colors.
- Mix small amounts of different colors together to create custom gradient hues.
- Apply the mixture in thin coats using a precision decorator’s tool for clean lines.
- Place your cake on a turntable and spin it slowly while you apply the gradient colors.
- This method allows the colors to blend naturally and creates a smooth gradient effect.
- For a more vibrant look, add a second layer of contrasting colors while the first layer is still wet.
- Understand that warm and cool colors mix differently. Warm colors (like red, orange) blend together, while cool colors (blue, green) blend separately.
- Use this knowledge to create harmonious gradients by pairing complementary colors.
- Experiment with color wheels to find the most eye-catching combinations.
- Dust the finished gradient with edible glitter or sparkles for a shimmering effect.
- Use a soft brush to gently press the glitter onto the surface without rubbing.
- This adds depth and makes the gradient appear more dynamic.
- Work in a well-ventilated area to allow the icing to dry properly between layers.
- Practice on dummy cakes or parchment paper before attempting gradient effects on actual baked goods.
- Consider using food coloring gels or powders for more vibrant and permanent colors.
By mastering these techniques, you can create gradient cakes that are both visually striking and professionally polished. For more tips and tools, explore our cake decorating techniques guide .
What Are the Best Ombre Cake Decorating Techniques to Achieve a Stunning Gradient Effect?
Ombre cake decorating is a fascinating technique that allows you to create visually striking gradients in your baked goods. Whether you’re a professional decorator or a home baker, mastering the ombre effect can elevate your creations to new heights. Here are some expert tips and techniques to help you achieve a perfect gradient effect:
- Preparation is Key
- Start by ensuring your cake base is perfectly level and smooth. A clean canvas ensures a professional finish.
- Use high-quality food coloring gels or liquid dyes for vibrant and long-lasting colors. Avoid liquid food coloring as it may lead to bleeding or uneven absorption.
- Heat your oven to the correct temperature according to your recipe. Proper heat distribution is crucial for consistent baking and coloring results.
- Coloring Methods
- Wet-On-Wet Technique: This method involves applying a lighter shade first and then gradually adding darker shades on top. The key is to allow each layer to set slightly before applying the next color. This creates a seamless transition and a rich gradient effect.
- Dry-Brush Technique: For a more subtle gradient, apply a thin coat of a darker color using a brush. This technique works well for creating soft transitions and adds depth to your design.
- Splash Technique: For a bold and dynamic gradient, lightly spray or brush a mixture of colors in quick strokes. This creates a ripple-like effect and is ideal for artistic designs.
- Layering Techniques
- Apply each color in thin layers, allowing the previous color to set completely before moving on to the next. This ensures the colors blend smoothly and prevents streaks or smudging.
- Use a fine-tipped brush or piping tip for precise control, especially when working with intricate designs. This helps in creating sharp edges and defined transitions between colors.
- Consider the texture of your cake. Smooth icing allows for better color adhesion and a more polished finish. Crumb coating can also provide a base for your gradient and prevent the cake from absorbing too much color.
- Tools and Equipment
- Pastry Brushes: Essential for applying smooth and even color layers.
- Fine-Tipped Paintbrushes: Ideal for detailed work and creating sharp lines.
- Icing Smokers: Useful for creating smoke effects and blending colors.
- Gel Food Colors: Provide better coverage and vibrancy compared to liquid colors.
- Troubleshooting Common Issues
- Uneven Color Distribution: Lightly dust with a small amount of sifted powdered sugar to settle any lumps of icing and create a smoother surface.
- Streaks or Blotchy Areas: Blend a tiny bit of the same color with a drop of water and paint over the affected area to balance the tones.
- Colors bleeding Into Each Other: Let each layer fully set before applying the next color. This prevents the colors from bleeding together and creates a crisp transition.
With these techniques, you can create ombre cakes that are not only visually stunning but also a delight to taste. Experiment with different color combinations and techniques to discover your own signature style. Happy baking!

0 Comments