


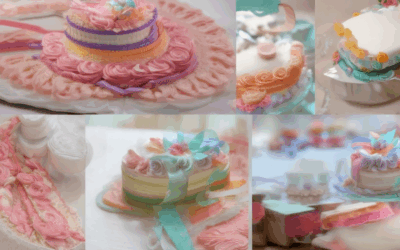
Creating a gradient cake frosting that looks stunning and professional can elevate your baking creations to new heights. While gradient effects may seem complex, achieving them is surprisingly achievable with the right techniques and tools. Whether you’re a seasoned baker or just starting out, this guide will walk you through everything you need to know to master gradient cake frosting. From ombre frosting to ruffle icing, we’ll explore multiple methods to achieve gradient effects, including layering colors, using temperature control, and maintaining consistency for smooth coverage. Discover the essential tools, like brushes and spizers, and learn how to avoid common mistakes. With these expert tips, you’ll be able to transform plain cakes into vibrant, eye-catching designs that are sure to impress. So, let’s dive in and unlock the secrets to creating gradient cake frostings that are as beautiful as they are delicious!
Key Takeaways
- Essential Tools: Use a pastry bag, round or Wilton tips, and an offset spatula for creating ruffled and gradient frosting effects.
- Ruffled Frosting Steps: Achieve a professional look by piping vertical lines and twisting for spirals, perfect for cakes needing a elegant touch.
- Gradient Frosting Technique: Layer colors from light to dark, using a fine tip for precision and allowing each layer to set before adding the next.
- Pro Tips: Maintain consistent pressure, work in a cool environment, and opt for buttercream for its versatility in gradient applications.
- Practice Makes Perfect: Experiment on parchment paper and adjust angles for seamless transitions, ensuring a smooth and professional finish.
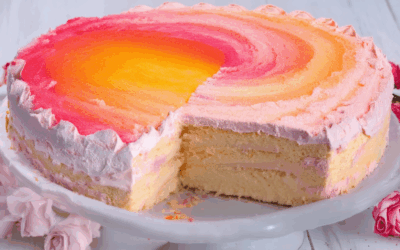
How to Achieve Ombre Frosting on a Cake
To create a stunning ombre effect on your cake, follow these simple steps:
Preparation
- Make sure your cake is fully baked and cooled.
- Prepare a batch of your favorite buttercream recipe.
Mixing Colors
- Start with a light color and gradually mix in darker shades.
- For a smooth transition, use a small amount of the next darker color in the mixture.
- Continue this process until you reach your darkest shade.
Application Techniques
- Using a pastry brush, lightly coat the top of your cake with the lightest color.
- Add a second layer with the next darkest shade, gently blending the edges with the lighter layer.
- Repeat this process until all colors are applied, allowing each layer to slightly blend with the one below it.
Creating the Gradient Effect
- For a gradient ombre effect, apply the colors in a circular motion, starting from the center outward.
- Let each layer set slightly before adding the next color to allow for better blending.
Finishing Touches
- Add decorative elements like fresh flowers, edible glitter, or sugar flowers for extra flair.
- Let the frosting set completely before serving or displaying the cake.
Tools You’ll Need
- Pastry brush
- Squeeze bottle or piping bag
- Small bowls for color mixing
- High-quality buttercream recipe
By following these steps, you can achieve a professional-looking ombre frosting that will elevate your cake to new heights!
Professional Cake Frosting Types
Cake frosting options vary based on preference, application, and visual appeal. Here are the most commonly used types by professionals:
- Buttercream : A creamy, versatile frosting ideal for classic and layered cakes. Known for its stability and ability to hold decorations.
- Cream Cheese Frosting : Offers a tangy flavor, perfect for balancing sweeter cakes like carrot or red velvet. Provides good stability for detailed designs.
- Ganache : A rich, luscious choice often used for drip cakes and elegant events. Available in variations like chocolate ganache for a deeper flavor.
- Fondant : A smooth, pliable option used for polished looks. Requires careful application to prevent cracks and drying issues.
- Yogurt-Based Frosting : A healthier alternative with a lighter texture, suitable for those seeking a less sweet option.
- Marzipan : Combines almond paste with sugar for a nutty flavor and textured finish, often mixed with other ingredients for easier spreading.
Each frosting type suits different aesthetic preferences and cake styles, allowing professionals to tailor the final look and taste to meet client needs.
How to Frost a Cake to Look Like Waves
To create a cake with a wave-like frosting effect, follow these organized steps:
- Tools Needed:
- Cake scraper
- Offset spatula
- Pastry brush
- Timing is Key: Work quickly but carefully to avoid the frosting setting too fast.
- Frosting Type: Use room-temperature buttercream for its smooth consistency.
- Apply the Base Layer:
- Start with a thin coat of frosting to cover the entire cake surface.
- Use the cake scraper to create a smooth base, ensuring no gaps.
- Create the Wave Design:
- Hold the cake scraper at an angle and carve lines from the center outward in one direction.
- Repeat in the opposite direction to create peaks, forming the wave effect.
- Add texture by gently tapping the scraper along the edges of the cake.
- Adjust Wave Height and Spacing: Ensure medium-sized peaks for stability and even spacing around the cake.
- Blend Edges Smoothly: Use the scraper to connect the peaks, avoiding sharp edges for a seamless look.
- Allow to Set: Let the frosting sit for at least 20 minutes before adding decorations to prevent smudging.
- Optional Finishing Touches:
- Add edible glitter for a shimmering effect.
- Top with fresh berries or flowers for extra flair.
How to Create Ruffled Icing on a Cake
To achieve a professional-looking ruffled icing effect on your cake, follow these simple steps:
Materials and Tools Needed
- Cake (preferably 5-minute cake for quick preparation)
- Buttercream frosting (your preferred flavor)
- Piping bags
- Round tip or Wilton tip for ruffling
- Small offset spatula or butter knife
- Cake stand or serving plate
Step-by-Step Instructions
- Prepare the Cake: Allow the cake to cool completely before frosting. A cooled cake ensures better adhesion of the frosting layers.
- Frost the Base Layer: Start by spreading a thin layer of buttercream evenly over the top of the cake using the spatula or butter knife. This creates a smooth base for your ruffles.
- Add the First Ruffle Layer: Hold the piping bag with the round tip or Wilton tip upright. Pipe a vertical line of frosting down the center of the cake. As you lift the bag, twist it slightly to create a spiral or ruffle pattern. Continue around the perimeter of the cake, overlapping slightly as you go.
- Create Additional Layers: Add another layer of frosting by piping another vertical line next to the first one, angling it slightly to create a second ruffle. Repeat this process, alternating the angle and direction of each subsequent layer until the entire top of the cake is covered in a ruffled design.
- Smooth and Adjust: Use the spatula or butter knife to gently smooth the frosting, blending the ruffles together for a seamless look. Trim any excess frosting that may have oozed out around the edges.
- Add Final Details: Finish by placing a small dollop of frosting in the center of the cake for a polished touch. Lightly dust with powdered sugar or edible glitter if desired.
Tips for Perfect Ruffles
- Practice on parchment paper or a separate bowl before applying to the cake.
- Keep the piping bag steady while ruffling to avoid ripples in the frosting.
- For a smoother edge, run the spatula along the sides of the cake after frosting.
Resources for Further Learning
Want to master ruffle techniques? Check out our comprehensive baking tutorials for more tips and tricks. Explore our cake decorating guide for inspiration and step-by-step guides tailored for beginners and advanced decorators alike.
Enjoy Your Creation!
Your cake will now boast a professional-looking ruffle icing that’s sure to impress family and friends. Happy baking!
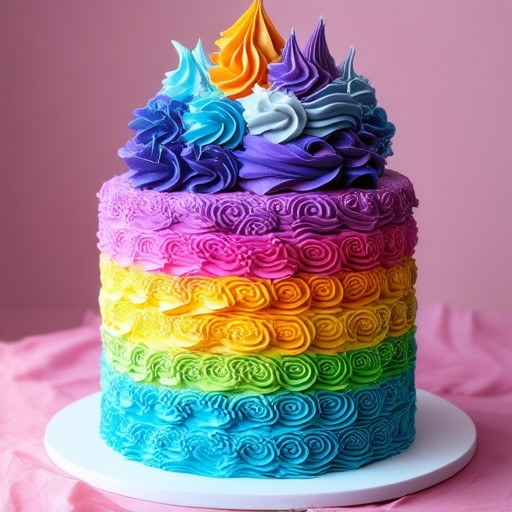
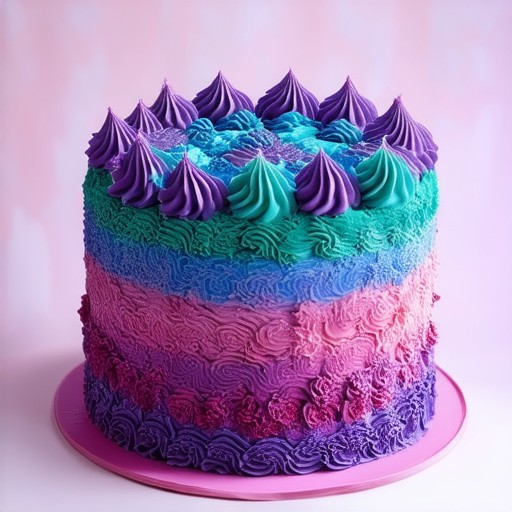
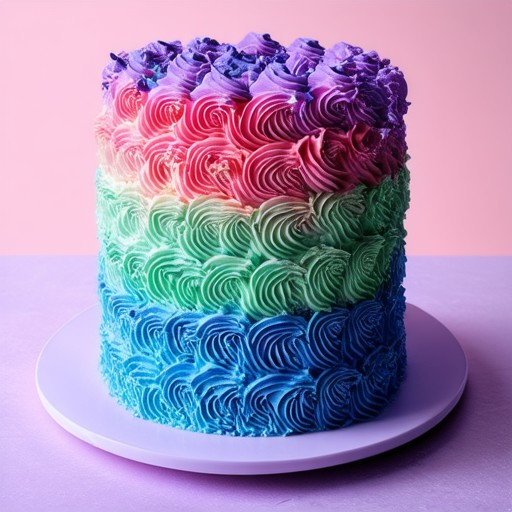
Creating a Gradient Effect with Cake Frosting
To achieve a gradient effect with cake frosting, follow these organized steps for a seamless transition between colors:
- Step 1: Prepare Your Base Color
- Step 2: Layer with a Second Color
- Step 3: Utilize the Smear and Pull Technique
- Step 4: Build Depth with Multiple Layers
- Step 5: Final Touches
Start by preparing your cake with a uniform base color using a pastry bag. Choose a light color as the foundation for the gradient.
Apply a second layer of frosting on top of the base color. Gradually mix in a slightly darker shade as you pipe, ensuring a smooth transition.
For a professional finish, use the “smear and pull” method. Spread the frosting with a palette knife and then pull the knife through the colors to create movement and texture.
Add more layers if desired, each time incorporating a deeper shade. Allow each layer to dry completely before adding the next color to prevent smudging.
Smooth out the frosting with a spatula and adjust the edges for a clean look. Consider adding decorative elements to enhance the gradient effect.
Tips for Success
- Consistency is Key: Ensure your frosting is thick enough to hold the gel but not too stiff. Keep it cool to maintain control during application.
- Temperature Control: Work in a cool environment to prevent the frosting from melting or running when mixed with gels.
- Drying Time: Allow each layer to set for approximately 15-20 minutes before adding the next color. This ensures the frosting won’t slide off.
- Tools Matter: Invest in tools like a gradient tube or specialized piping bags to achieve a smoother application. Couplers with various tips can offer precise control.
- Frosting Type: Opt for buttercream over fondant for its flexibility and ease of manipulation when creating gradients.
By following these steps and tips, you can effortlessly create a gradient cake frosting that looks professional and stunning. For more detailed guides and inspiration, explore our cake decorating tutorials on Tort Decor.
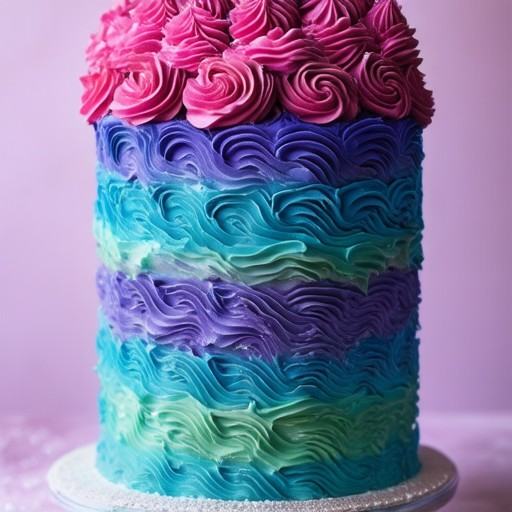
Creating a Gradient Effect with Cake Frosting
To achieve a gradient effect with your cake frosting, follow these organized steps for a seamless transition between colors:
- Understand the Basics of Gradient : A gradient involves a smooth transition from one color to another. In cake frosting, this can be achieved by layering different colors.
- Prepare Your Tools :
- Pastry Bag : Use a disposable pastry bag for easier cleaning and control.
- Tips : Choose a fine tip (e.g., Wilton Tip 12) for precise detailing.
- Food Dyes/Gels : Select high-quality gel colors for vibrant results.
- Layer Colors Strategically :
- Start with the lightest color at the tip of the pastry bag.
- Gradually introduce darker shades as you move along the cake surface.
- Application Technique :
- Hold the pastry bag at an angle to allow for controlled oozing.
- Pipe in short, steady strokes, lifting the bag slightly between strokes.
- Build Layers :
- Apply multiple layers, each slightly darker than the previous, to create depth.
- Allow each layer to set before adding the next to avoid smudging.
- Consider Frosting Type :
- Use buttercream for its creamy texture, which holds well and allows for blending.
- Avoid thin frostings that may run or smudge easily.
- Practice and Patience :
- Practice on a test surface to master the pressure and flow.
- Take your time to ensure each layer is even and transitions smoothly.
By following these steps, you can create a gradient effect that adds elegance and visual interest to your baked goods. Experiment with color combinations to match your event or personal style.

0 Comments